Step-By Step Guide: Creating Product Demo Videos to Boost Sales
By Duncan Whitmore
For internet marketers, product demo videos are a great way of boosting sales. They provide an engaging narrative that demonstrates your product's features, benefits, and ways it can solve your customer's problems.
Indeed, according to research, consumers are almost twice as likely to make a purchase after watching a product demo video.[1]
But here's the question: How do you craft a product demo video that not just informs but converts?
Let's follow a step-by-step guide to help you master the art of creating product demo videos to boost sales.
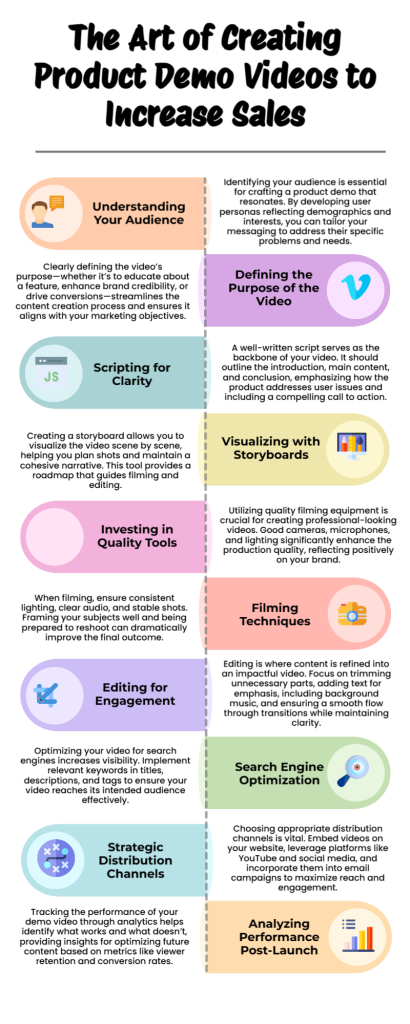
Step 1: Know Your Audience
Before you get started with the nuts and bolts of production, knowing your audience is critical.
Consider yourself as the liaison between your product and the potential users. What are their problems? What solutions are they seeking?
Create a user persona that encapsulates demographics, interests, and shopping behavior. This foundational step ensures that your demo video speaks directly to your audience's needs, setting a solid groundwork for compelling storytelling.
Step 2: Define Your Video's Purpose
The next step is to understand the core purpose of your video.
Are you aiming to educate your audience about a new feature? Maybe you want to enhance brand credibility, or perhaps it's all about boosting conversions.
Defining a clear purpose helps streamline the video creation process and ensures every second of footage contributes to achieving your marketing goals.
Step 3: Script It Out
Great execution and great timing come from clear planning. Writing a script is essential for maintaining focus and structure.
Your script should include:
- An Introduction: Begin with a hook to catch the viewer's attention instantly.
- Main Content: Explain how the product solves the viewer’s issues, supported by visuals.
- Conclusion: Reinforce key points and include a call to action (CTA).
Taking the time to create a detailed script helps you stay organized and make sure your message is clear and concise.
Step 4: Storyboarding
Once your script is polished, it’s time to bring it to life with a storyboard.
A storyboard is a visual representation of each scene in your video. It doesn’t have to be a masterpiece of art—simple sketches or digital templates will suffice.
The idea is to visualize how each part of the video will unfold, providing a blueprint for filming and editing.
Step 5: Choose the Right Tools
The quality of your video reflects directly on your brand. While it's balanced between budget considerations and quality standards, investing in basic equipment—like a good camera, tripod, microphone, and lighting—can transform the professional appeal of your video.
There are also plenty of accessible video editing software options out there. Whether you opt for something user-friendly like iMovie or more intricate choices like Adobe Premiere Pro, ensure your choice aligns with your skill level and the video’s requirements.
Step 6: Filming with Precision
Now, it's showtime! When filming, keep these tips in mind:
- Consistent Lighting: Achieve natural lighting by filming during the day or using soft, diffused artificial lighting.
- Stabilization: Use a tripod or stabilizer to prevent shaky footage.
- Framing: Maintain a good composition. The rule of thirds is helpful here.
- Audio Quality: Ensure clear sound. Test your microphone before you begin.
Remember, multiple takes are not a menace; they are your ally. Don’t hesitate to reshoot until you nail it.

Step 7: Edit with Impact
Editing is where your footage transforms into an engaging story. Here are some editing essentials:
- Trim your footage to cut out any unnecessary parts and ensure the video flows smoothly.
- Include text overlays and graphics for emphasis and clarity.
- Insert background music that complements the mood without overshadowing the message.
- Add transitions to maintain the flow between clips.
- Most importantly, ensure your call to action is clear and compelling.
While editing, it's easy to overdo, so remember the adage "less is more."
Step 8: Optimize for Search Engines
Your product demo video is ready, but without proper SEO optimization, it may not reach its full potential audience.
Use keywords strategically in your video title, description, and tags. Tools like YouTube's keyword planner can help in selecting relevant phrases.
A well-optimized video has a better chance of being discovered by people searching for solutions your product provides.
Step 9: Choose Your Distribution Channels
Once your product demo video is polished and optimized, consider where you’ll distribute it. Some of the most effective channels include:
- Your Website: Embed it on product pages to aid the buyer journey.
- YouTube and Social Media: These platforms offer massive reach potential.
- Email Campaigns: Incorporate videos in your newsletters to engage your subscribers.
Consider where your audience spends the most time and prioritize those channels.
Step 10: Analyze and Optimize
After your video is live, track its performance. Use analytics to assess metrics like watch time, viewer retention, click-through rates, and conversions.
Understanding these insights will inform what worked and what didn’t, allowing you to refine future videos.
Conclusion
Creating product demo videos to boost sales is both an art and a science. It requires creativity, planning, and strategic distribution.
By following these steps, you'll not only produce a polished product demo video but also engage your audience and enhance your sales strategy.
* * * * *


